Creating Plans
Creating a Plan From a Pre-defined Template
Workteam provides a number of pre-defined templates for creating plans that are suitable for managing a number of different kinds of projects.
To create a new plan based on a pre-defined template, go to the Planner view and press the New Plan button, located in the top banner. A New Plan dialog will be shown. Enter a name for the new plan, e.g. Team tasks and select the From a template radio button.
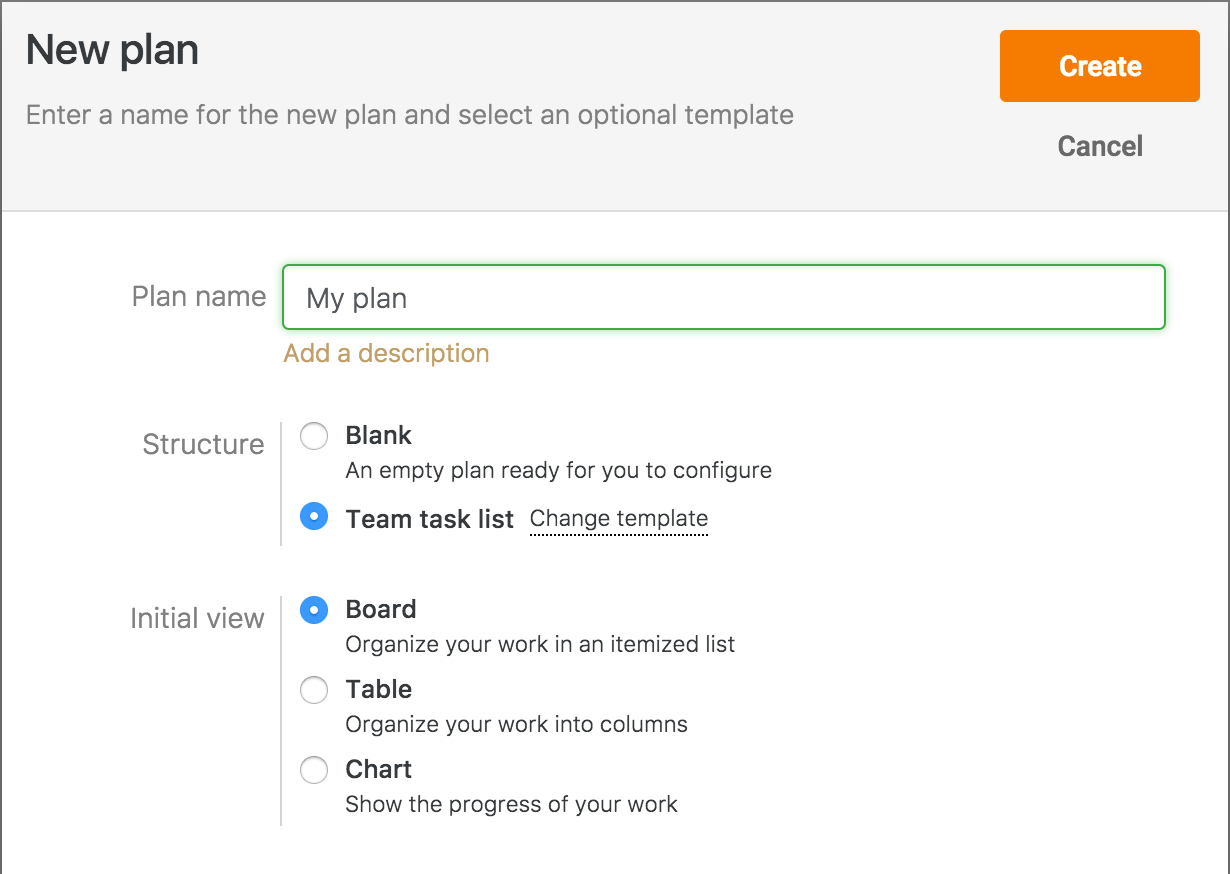
When you select the radio button, a list of pre-defined templates will appear, each containing a button for previewing the template and a button for selecting the template.
Only templates provided by Workteam will contain a Preview button. Templates created by your team members in your organization will show only a Select button.
Each Preview button will show a further dialog that provides screenshots of what the template will look like once you have created. Choose a template and press the Select button.
The New Plan dialog will be shown once again, this time the From a template radio button will change to display the name of the template you have chosen.
Each pre-defined template defines the default view, either Board view, Table view or Chart view. This will be automatically selected once you have chosen the template, however you can change the default simply by selecting one of the Board, Table or Chart radio buttons in the New Plan dialog.
Finally, press the Create button at the top of the dialog to create the new plan.
Creating a Blank Plan
In some cases, you may want to create a blank plan and design it from scratch to include the fields that you need to manage your particular project.
To create a new blank plan, go to the Planner view and press the New Plan button, located in the top banner. A New Plan dialog will be shown. Enter a name for the new plan and select the Blank radio button. When you press the Create button a new plan will be created, which does not contain any pre-defined buckets or any fields, except for a Status field.
Most plans will benefit from a status field, since it helps track the progress of plan items, however it may be deleted if it is not needed.
Creating a Plan Template
Workteam provides a number of pre-defined plan templates, but any team member can create and design a new plan and make it available as a template. Doing so, will mean that other users may select this plan to use as a template for a new plan in the New Plan dialog.
Duplicating a Plan
If you would like to create a new plan based on an existing plan, but you don’t want to expose the existing plan as a template, then you can duplicate the plan. Select the plan that you wish to duplicate from the list of plans at https://app.workte.am/planner and press the settings icon at the top right of the card representing the plan. Choose Duplicate from the drop down menu. A Duplicate plan dialog is shown, letting you additionally select whether to duplicate the content of the plan and the membership. To go ahead and duplicate the plan, press the Duplicate button in the dialog. A new plan called “Copy of {copied-planner-name}” will appear in the list of plans.
Attaching Files to a Plan Item
Workteam lets you attach any kind of file to a plan item. For instance, if you have a plan, which tracks candidates being recruited by your company, you’ll probably want to have a plan item representing each candidate and attach their resume to the appropriate plan item. Once you attach a file to a plan, all other users will have access to view the attachment from within Workteam.
To attach a file to a plan item, open the plan item, by clicking on the relevant plan item in Board view and then click the attachment icon at the top of the Plan Item dialog. A file chooser will appear, allowing you to choose any file from your local computer. Once you have done this, the file attachment will appear as an entry in the Plan Item dialog. Clicking on the entry will preview the attachment in the appropriate viewer. Microsoft Office files, Adobe PDF files and any image file may be previewed.
If you attach an image file, Workteam automatically creates a thumbnail of the image, which it shows in the Board view and within the comments section of the Plan Item dialog.
If you attach more than one image to a single plan item, Workteam shows the most recent image attached in Board view.
Adding Checklist Items to a Plan Item
Sometimes, you will want to break down an item of work into sub-items or you may want to create a checklist of items that are associated with a plan item. You can do this from within the Plan Item dialog. In the right-hand portion of the Plan Item dialog, click on the box named Enter a new checklist item and enter a name for the checklist item and press Enter.
You can mark a checklist item as complete by ticking the checkbox to the left of the checklist item name.
If a plan item contains one or more checklist items, the completion status of the checklist items will be displayed in the Board view, displaying how many checklist items have been completed of the total number of checklist items.
Deleting a Plan Item
You can delete a plan item by opening the plan item and pressing the Delete button at the top of the Plan Item dialog. From within the Table view you can also select Delete Item from the dropdown menu that appears to the left of the item when you position the mouse pointer over the item.
Changing a Plan’s Color
You can change the background color of a Workteam Plan by opening the plan and clicking the square to the left of the plan title. Workteam will display a color swatch from which you can choose the appropriate color. Workteam will remember the color and other users, with whom you have shared the plan, will also see the chosen background color.
You can reset the background color to the default color by selecting the transparent color, which is the bottom right color in the swatch.